Intro to course
Welcome to Boys and Girl's Club's App Design & Development course! As an instructor, you'll be helping students as they learn to program Android apps with MIT App Inventor and design an app of their own. The goals of the course are outlined below:
Mission Statement: To cultivate middle schooler’s passions for computer science by teaching them to program, conceptualize, and design Android apps.
Sub-Goals:
Mission Statement: To cultivate middle schooler’s passions for computer science by teaching them to program, conceptualize, and design Android apps.
Sub-Goals:
- Programming
- Follow MIT App Inventor tutorials to implement diverse app functionality and computer science foundations.
- Conception
- Brainstorm app ideas, then create a features list and app description.
- Design
- Learn about User Interface design principles to create a paper prototype.
- Passion
- Instill passion for programming in students through showing them the impact, opportunities, and creativity computer science entails.
Create gmail account
Now you'll need to create a gmail account to use for the rest of the course. Follow the instructions on the site with the following specifications:
Username: firstname.lastname.bgccs
Ex. john.smith.bgccs
Password: bgccs
Do not enter a phone number or current email address, just skip both those steps.
Username: firstname.lastname.bgccs
Ex. john.smith.bgccs
Password: bgccs
Do not enter a phone number or current email address, just skip both those steps.
course folder
Now that you're logged into your email you can start exploring the course materials. Go to the course folder and follow the instructions below to create your own copy:
- Highlight all of the documents in the folder
- Right click on them and click "Make a Copy"
- Click on "My Drive" in the top left corner
- Click the red "New" button
- Click "Folder"
- Name the Folder "<Season> <Year> App Design & Development
- Click on "Resources" in the left column
- Drag the copies of the documents into your new folder
Pre-Course survey
Please fill out the instructor pre-course survey to help improve the course in the future as well as outline your hopes for what you will achieve through teaching.
App Inventor Tutorial
MIT App Inventor is the most complex software that the students will be using in this course. You'll need a basic knowledge of how it works to help students.
App Inventor creates Android apps. It uses drag-and-drop programming similar to Scratch to make app development simple and quick. Please follow the steps below to set up your account:
Mac OS X Windows Linux
Please only follow the instructions on these page links - you don't need to follow any other links.
If you're using a Mac, the emulator will run invisibly in the background when you open your MIT App Inventor account. If you're using Windows or Linux, there will be an icon on your desktop that you'll have to click on when you want to use the emulator.
Now you'll learn more in-depth how App Inventor works. First keep in mind that there are two main parts of every app, the design and the code. App Inventor uses a simple drag and drop interface to create app screens. Watch the video below to get an overview of how it works:
App Inventor creates Android apps. It uses drag-and-drop programming similar to Scratch to make app development simple and quick. Please follow the steps below to set up your account:
- Go to the MIT App Inventor site and click on the Create Apps button in the top right corner.
- Make sure you're logged into your gmail account
- Click continue to log into MIT App Inventor with gmail
Mac OS X Windows Linux
Please only follow the instructions on these page links - you don't need to follow any other links.
If you're using a Mac, the emulator will run invisibly in the background when you open your MIT App Inventor account. If you're using Windows or Linux, there will be an icon on your desktop that you'll have to click on when you want to use the emulator.
Now you'll learn more in-depth how App Inventor works. First keep in mind that there are two main parts of every app, the design and the code. App Inventor uses a simple drag and drop interface to create app screens. Watch the video below to get an overview of how it works:
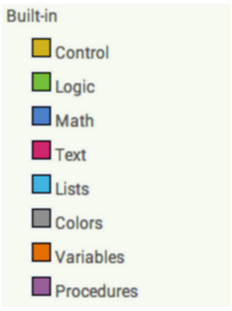
For its code, App Inventor uses built in drag-and-drop blocks similar to Scratch. These blocks are kept in drawers according to their type. Click through the links below to expose yourself to all the different blocks.
To get a more hands-on experience with App Inventor, you're going to make a very simple app. The students will also make this app during the course, so you'll be a pro by the time that lesson comes around! Follow the video below to create the "Ball Bounce" app:
Great job! Now you're ready to move on and learn about the other software that the students will use throughout the course.
Course folder documents
lesson plans
Open Google Drive, go to your course folder, and open the "Lesson Plans" doc. This doc provides an outline of the entire course, broken down into 15 one hour sessions. Fill in the date when each session will be held. Now, carefully read through the entire doc. You'll be referring to and following this doc for the entire course, so it'll be important to know it well.
student tracker
Now go back to the course folder and open the "Student Tracker" spreadsheet. This document is crucial as it allows you to note students' progress and keep them on track. The top row of the spreadsheet shows all the benchmarks students should hit during the course. If a student completes a project, fill in that rectangle with green. Some students may fall far behind and have to skip some of the earlier projects. If this occurs, put red in that rectangle. However, try to avoid students skipping any benchmarks. It is fine if they do not finish the course, just encourage them to get as far as they can.
website tour
Open the student curriculum website. Take some time to look through the course material that the students will be completing. The more you know the specifics of the course, the better you'll be able to teach it, so make sure to read carefully!
Wrap-up
Great work - now you're ready to teach the course! Please contact [email protected] if you have any questions.
